Electrical Basics
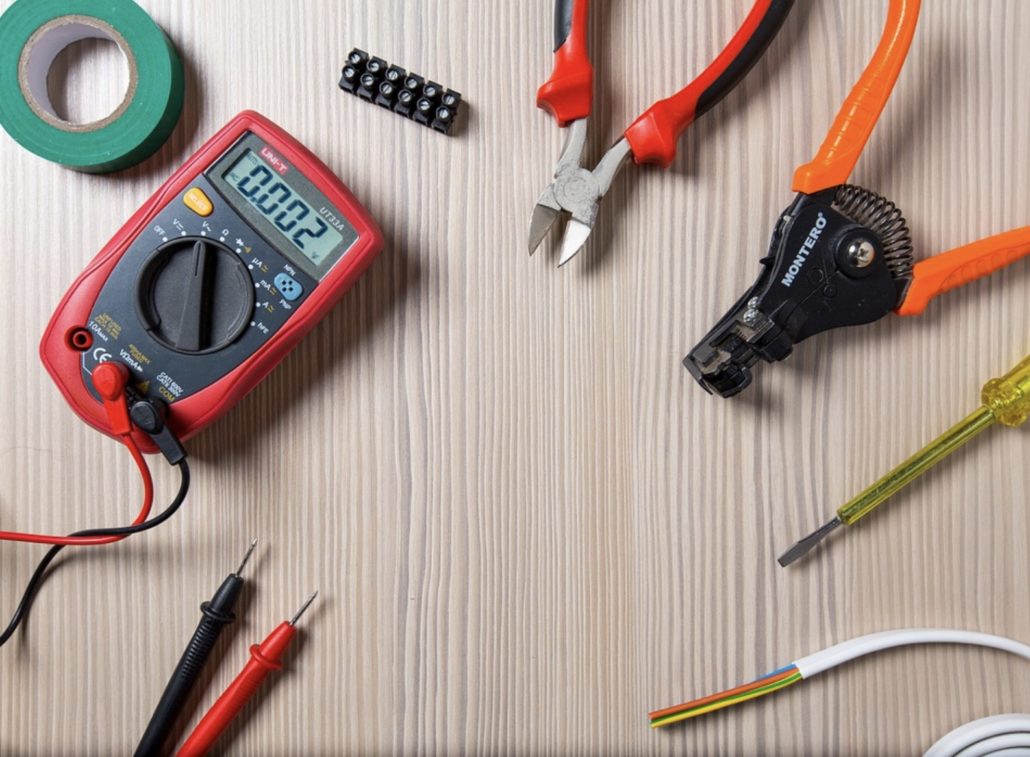
Making a good electrical repair or correctly installing electronics on your boat can make a huge difference in the longevity of the project. The correct tools and proper materials will make for a quick and long lasting repair or install. With a good test light tracking an electrical problem is quite easy whether its in the bilge, under the helm or within the gunnels. When installing a new depth sounder, marine radio, bilge pump, horn, radar, ect with all the right stuff the job will be easy. Tools and materials needed for most repairs and installations include, basic hand tools, a 1/2 inch drill, 3/8 cordless drill, a set of drill bits, assorted hole saws, crimper/wire stripping tool, double stranded wire, assorted connectors, electrical tape, fuses, fuse holders, silicone caulk, test light, soldering gun, solder paste, tie straps, misc. stainless screws, side cutters and shrink tube. Depending on the project one or more of these will be needed. All electrical and electronics require that they be fused or go through a breaker, also the proper gauge wire will be needed. A good battery ground is a must to ensure good current flow and help reduce static noise on the radio equipment. [expander_maker id=”2″ more=”Read more” less=”Read less”]
The best setup to run electronics from the cockpit area is to have a fuse or breaker panel to tap off from. If there is no panel one should be installed. A red(pos) and black(neg) in a 8-10 gauge wire should handle most boats, and should be fused at the battery with a 30 amp fuse. Then each individual electronic item can be wired seperately from the fuse box with the appropriate fuse/breaker. Running a new wire back to the battery for each electronic item will lead to a messy install as well as being more prone to electrical problems. Most electronics and electrical items will use a 16-18 gauge wire.Stripping the wire and twisting it together and a little black tape is “not” a good repair. For most cases using connectors and a good crimping tool is all that is needed. In a wet enviroment such as the bilge area or at the battery, soldered connections are best and will last a long time. Making soldered connections through-out the boat will ensure that there will be no electrical problems. Using shrink tubing over the soldered connections will give a nice appearance and protect from shorting. Electrical tape should be used as little as possible and used only when needed. Tie-straps will keep your electrical wiring looking tidy and out of the way.
Petroleum jelly is a product that can help keep electrical components working and free from corrosion. Boat running lights and the stern light socket are very prone to corrosion and it is the corrosion that is the main problem with lighting failures. A small amount of petroleum jelly on the contacts and the gounding portion of the light bulb will keep the light socket from corrosion. Trailers lights and the trailer harness plug will benefit also. The vehicle trailer plug is a good idea too as it corrodes as well. Fuse holders and fuse blocks could also use a little protectant..When installing new electronics or replacing an old one, take your time and read the instruction completely. A mock setup is always a good idea as to make sure it does not interfere with anything else. Also it is a good idea to check the other side if you will be drilling to make sure there is nothing in the way or if there is enough room for access if needed. Think twice and drill once is a good rule to follow. A good silicone caulk should be used where needed such as drilling through the transom, and always use a philip head syle stainless screw for installations. The philips head holds a screwdriver much better without sliding out. Take your time and you can do a professional job!
